

Generate "Get Directions" Links
Follow our quick start guide to generate Get Directions links in minutes. Great to send and share with Operations or IT teams to incorporate into existing resident, onsite and marketing workflows.
Overview
SightMap's Get Directions feature provides navigation to a specific unit. Add Get Directions links to:
- Renter welcome emails
- Tour confirmation emails & SMS messages
- Guest, vendor, and delivery communications
- CRM and marketing workflows
A Get Directions link opens SightMap and displays a route from a starting location (such as a leasing office or property entrance) to a specific unit.
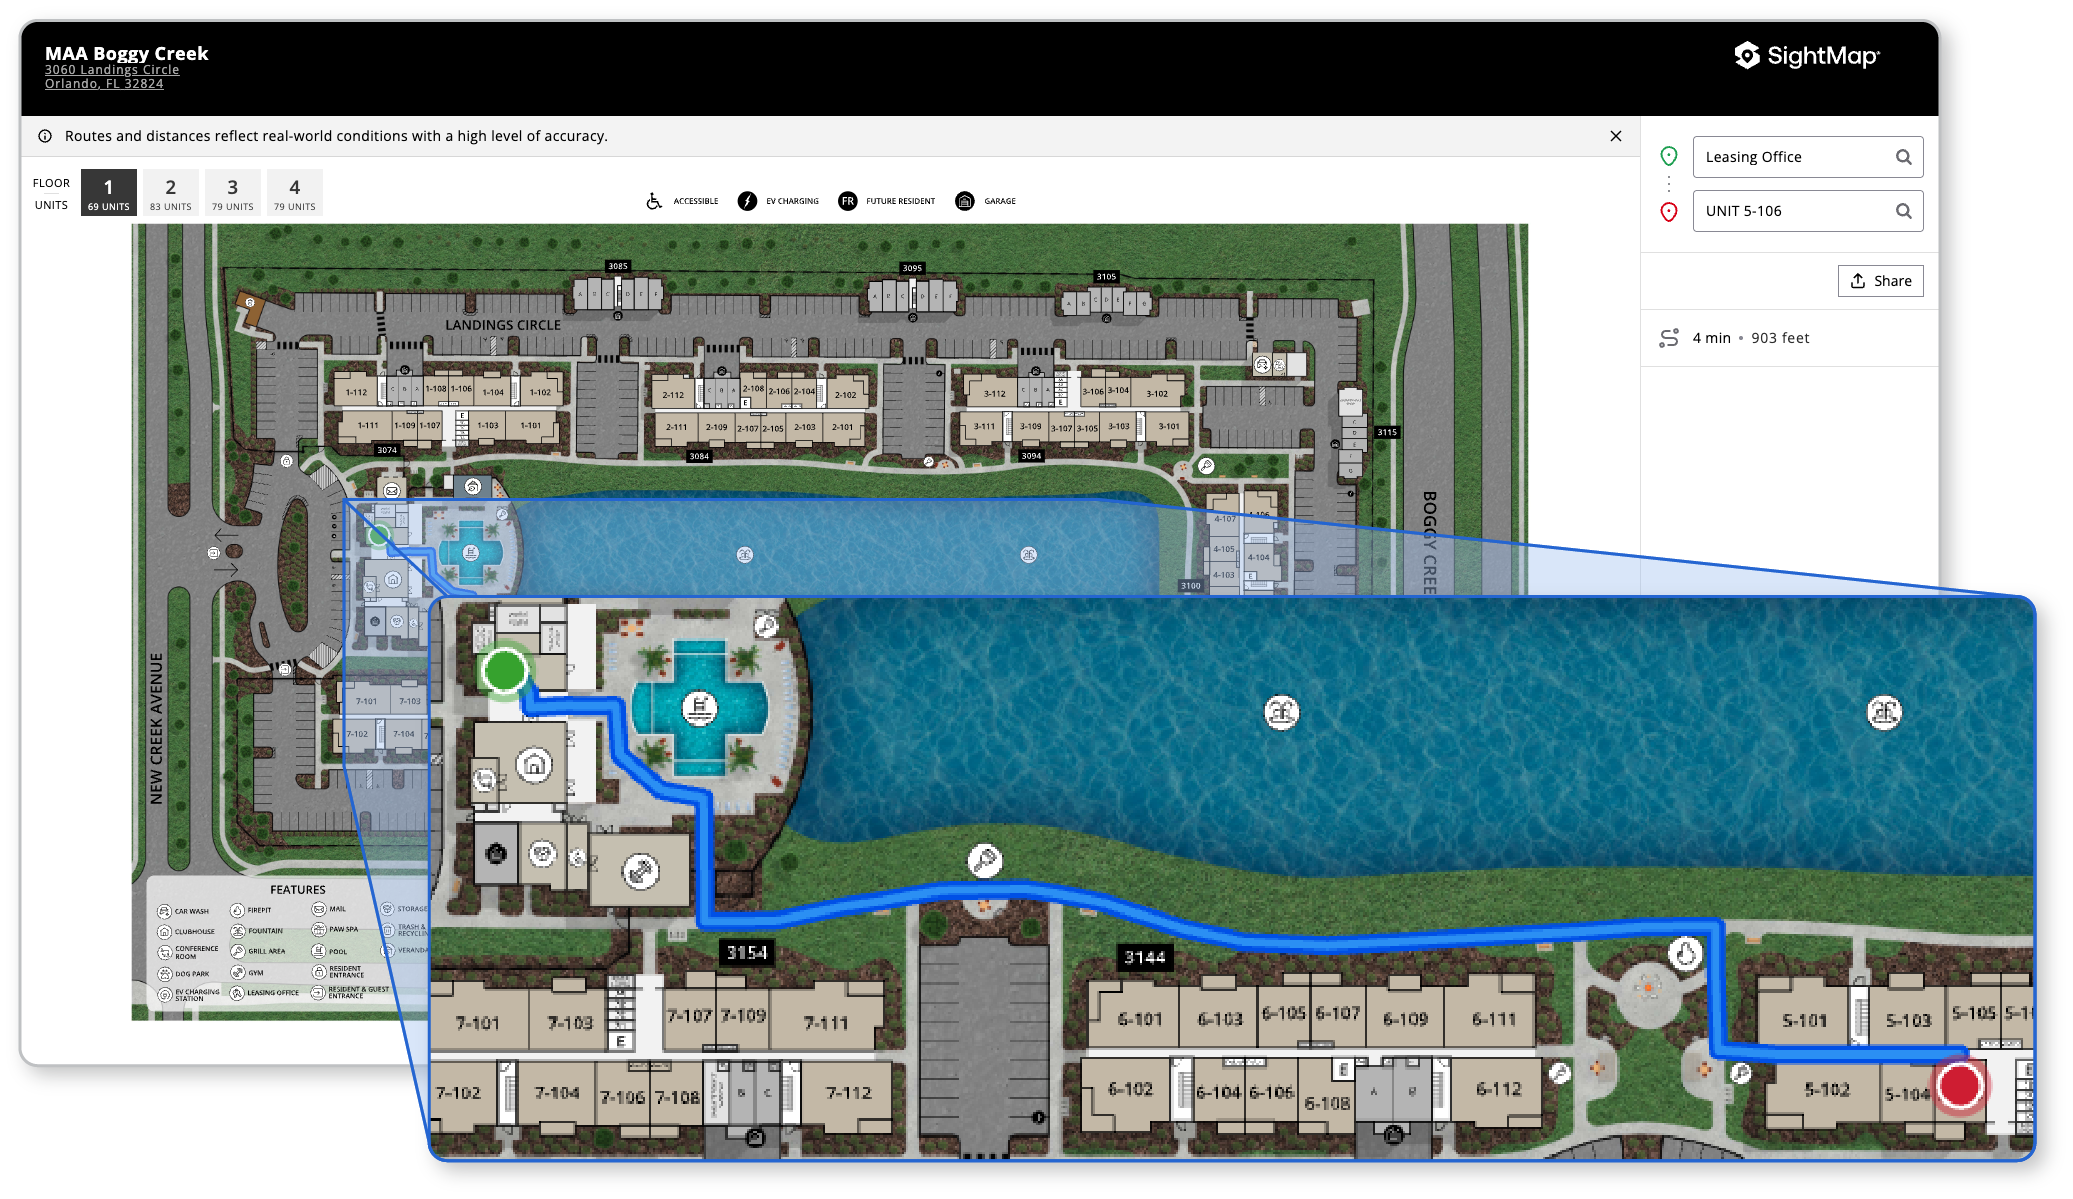
Get Directions links open SightMap with routing already displayed.
How It Works
Get Directions is a URL template specific to each asset or property.
https://sightmap.com/share/x1p881ddpd6?mode=directions&s=leasing_office&d={{unit_id}}Every property-specific URL template has a {{unit_id}} placeholder. This is where the destination unit's ID is filled in.
For example, if the unit ID is 4683226, the link would be https://sightmap.com/share/x1p881ddpd6?mode=directions&s=leasing_office&d=4683226.
Prerequisites
Before generating a Get Directions link, you must have:
- A valid SightMap API key
- Permission to read unit data:
sightmap.units.read - Permission to read unit outbound links:
sightmap.unit-outbound-links.read
Generating Links
You Will Need
To generate a Get Directions link, you will need:
- Asset ID (or Property ID)
- Unit ID
- Get Directions URL template
Store These Values for Future UseMost applications retrieve these values once, then make simple string substitutions to generate additional Get Directions links.
Step 1: Identify the Asset ID
Start by identifying the property's asset ID. If you don't already have the asset ID, refer to the List Assets endpoint.
Save the property's asset ID. This will be used to retrieve the URL template in Step 3.
Example List Assets Response
{
  "paging": {
    "per_page": 100,
    "current_page": 1
  },
  "data": [
    {
      "id": "13907,
      "name": "MAA Boggy Creek",
      "market": "multifamily"
    }
  ]
}
Step 2: Retrieve the Unit ID
Find the unit ID for the specific unit you want to reference. Refer to the List Units endpoint to retrieve the property's units.
Save the unit ID. It can be reused when generating future Get Directions links for that unit.
Example List Units Response
{
  "data": [
    {
      "id": "4683226",
      "number": "5-106""
    }
  ]
}
Step 3: Retrieve the URL Template
Use the View a Unit Outbound Link endpoint to retrieve the property-specific URL template.
Save the template field value.
Example Unit Outbound Link Response
{
  {
"id": "56350",
"asset_id": "13907",
"name": "Get Directions [URL]",
"label": "Get Directions to Unit",
"template": "https://sightmap.com/share/x1p881ddpd6?mode=directions&s=leasing_office&d={{unit_id}}"
}
}
Step 4: Generate the Link
The URL template contains a {{unit_id}} placeholder. Replace the placeholder with the unit ID retrieved in Step 2.
Example Template
https://sightmap.com/share/x1p881ddpd6?mode=directions&s=leasing_office&d={{unit_id}}Add the unit ID: 4683226
Example Get Directions Link
https://sightmap.com/share/x1p881ddpd6?mode=directions&s=leasing_office&d=4683226The resulting Get Directions link is complete and ready to use.
Summary
- Identify the property's asset ID.
- Identify the unit ID for the desired unit.
- Retrieve the property's Get Directions tempate.
- Replace
{{unit_id}}in the template with the unit ID.
The resulting Get Directions link directions users to navigation for the specified unit.
Having trouble?
Contact us at [email protected] for further assistance.
Follow our Quick Start Guide to generate Get Directions links in minutes. Great to send and share with Operations or IT teams to incorporate into existing resident, onsite and marketing workflows.
Updated about 20 hours ago